
-
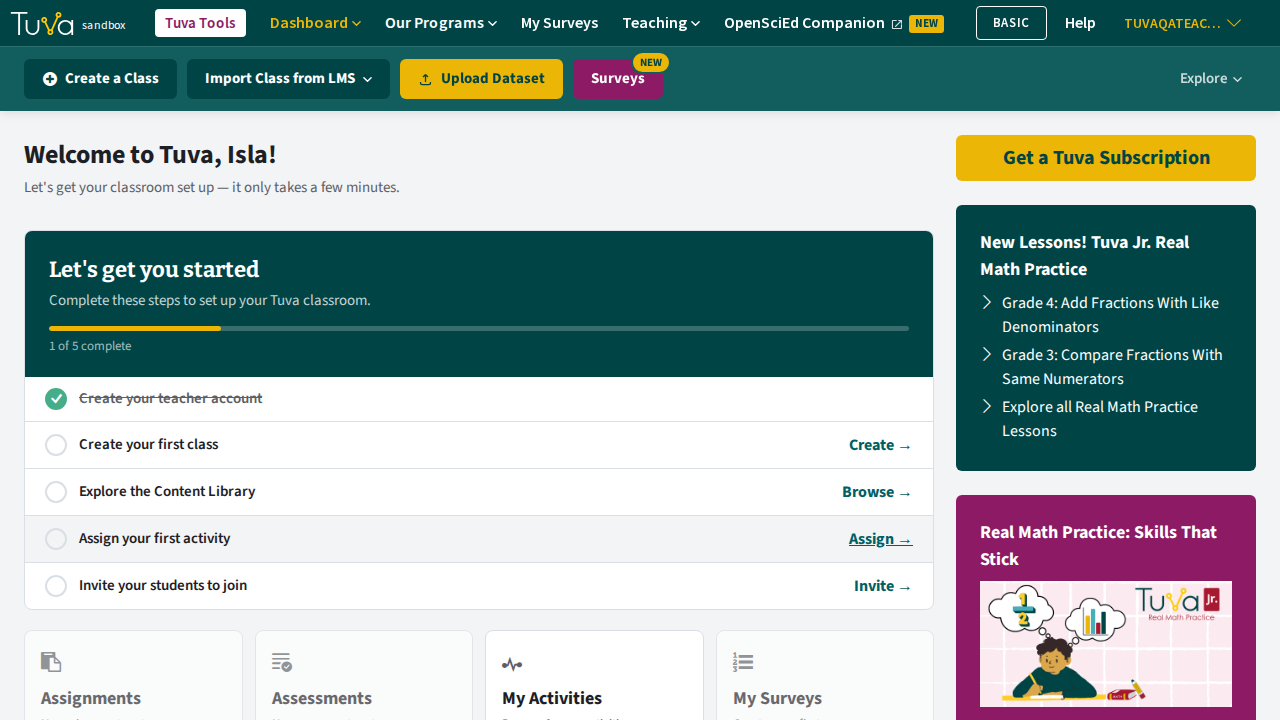
From your dashboard, click Upload Dataset in the toolbar. You can also go directly to tuvalabs.com/upload, though that opens the same picker on a different starting tab.
-
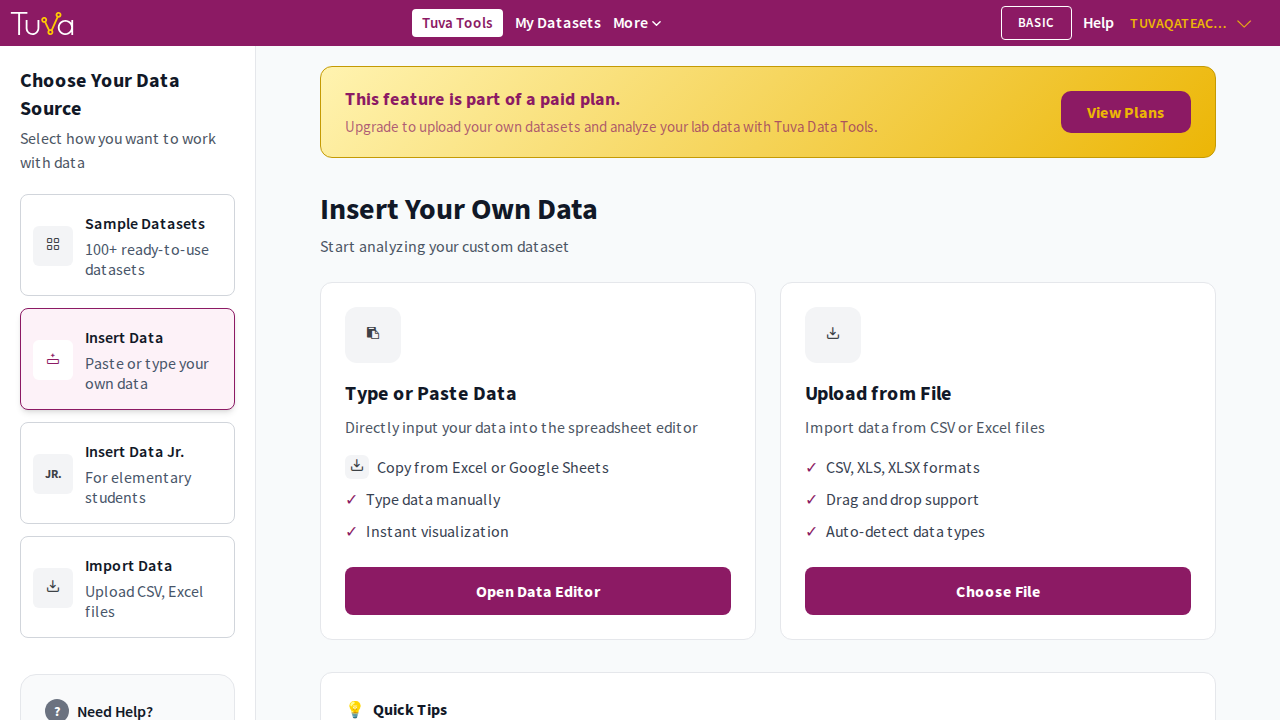
Tuva opens Choose Your Data Source, with four tabs: Sample Datasets, Insert Data, Insert Data Jr., and Import Data. Click Import Data to upload a file from your computer.
-
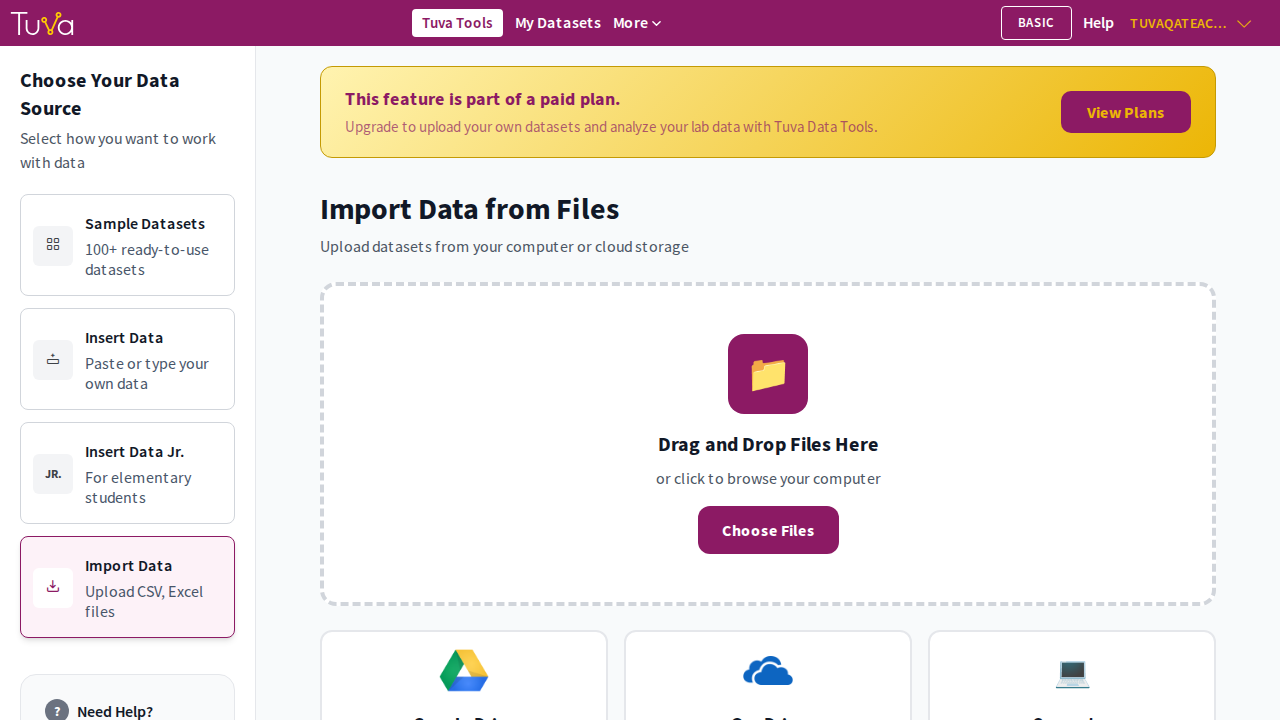
On the Import Data tab, drag your CSV, XLS, or XLSX file into the box, or click Choose Files to browse your computer. You can also import directly from Google Drive or OneDrive using the options below the box. On the Basic plan, each upload counts against your account’s dataset quota, shown later on the My Datasets page.
-
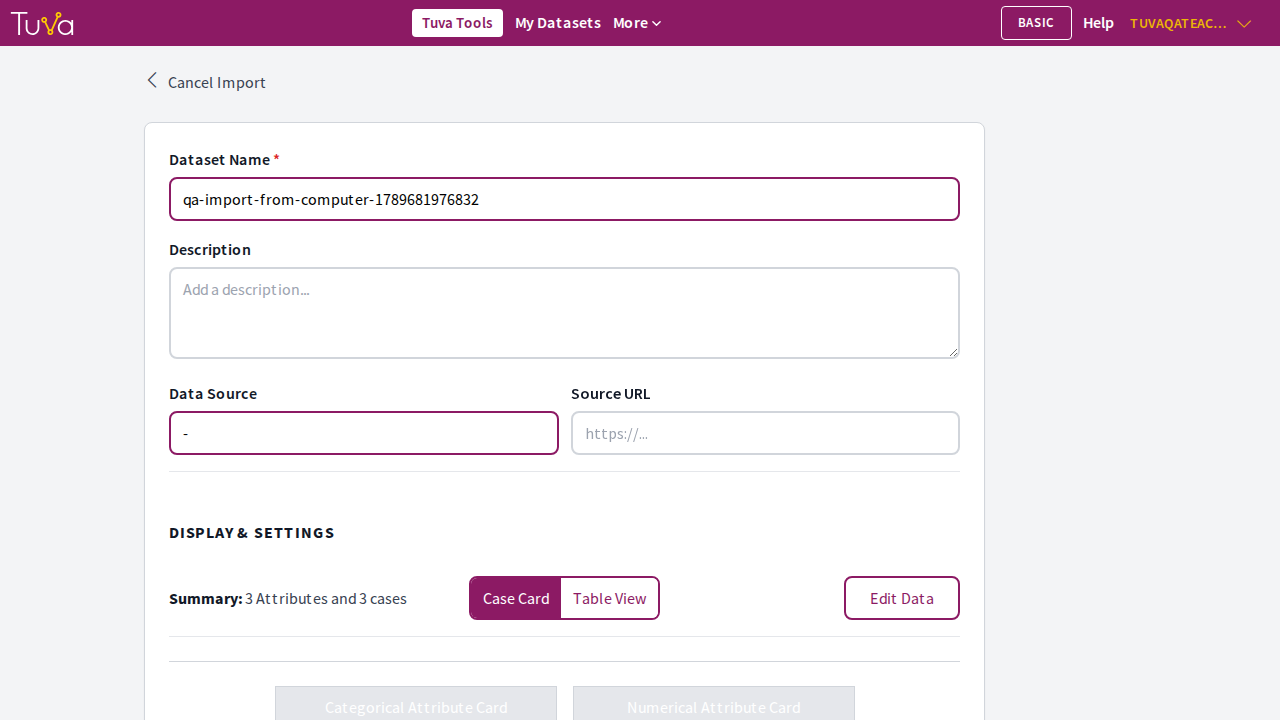
Once you select or drop a file, Tuva automatically opens a screen to review the data. Confirm the dataset name — it defaults to your file name — and review the data that was imported.
-
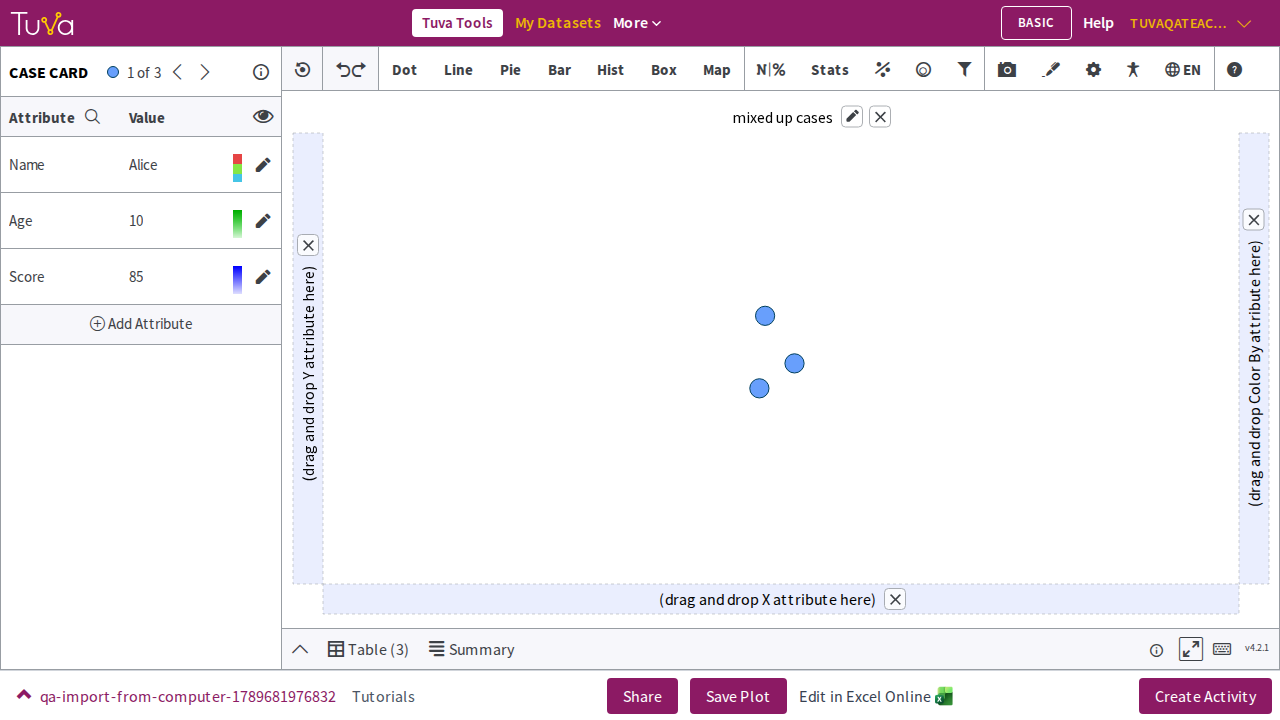
Click Import Dataset. Tuva takes you to the visualization screen, where you can begin analyzing your data.
-
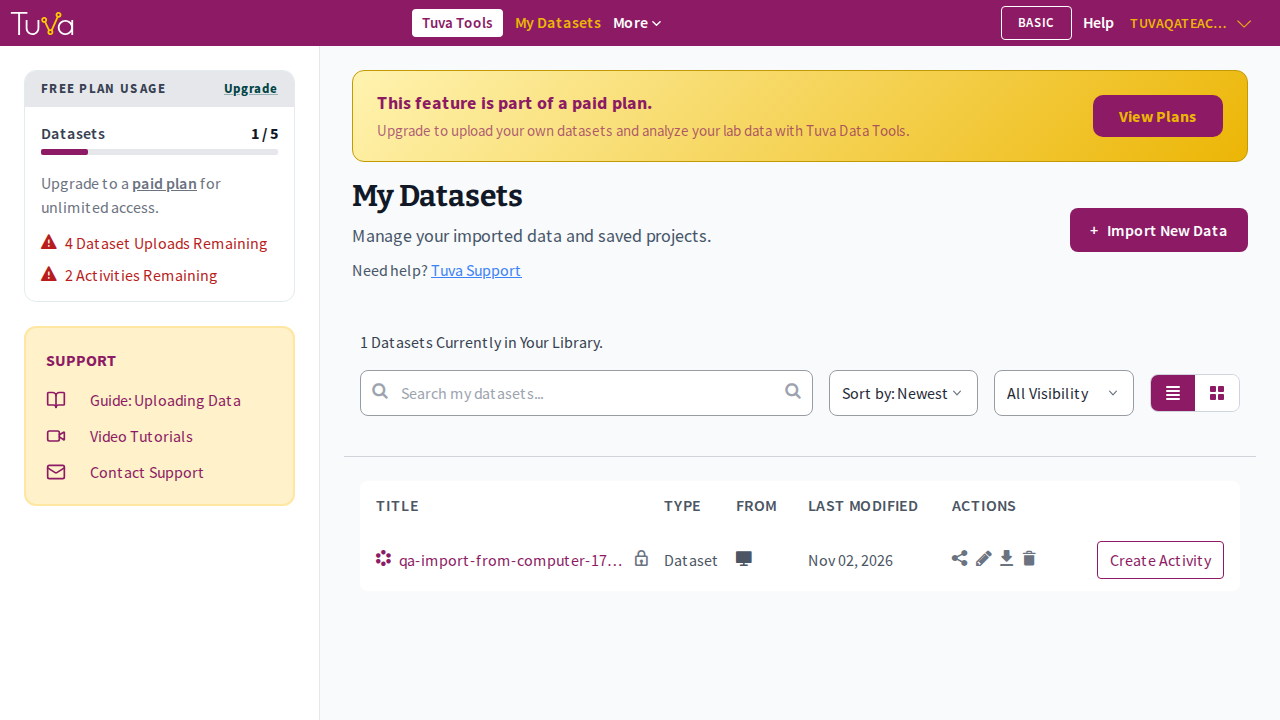
Your dataset is now listed on My Datasets. On the Basic plan, the usage panel on the left shows how many of your dataset uploads you have used and how many remain.
Was this page helpful?
This opens the ticket form with your comment and a link to this page, so we can reply to you.
Submit a ticket