
Sharing a dataset lets your students open it and explore it themselves. You can share with a whole class, or hand out a link that works for anyone.
Only datasets you own can be shared — import your own or fork one first.
Share a dataset with your class
Section titled “Share a dataset with your class”-
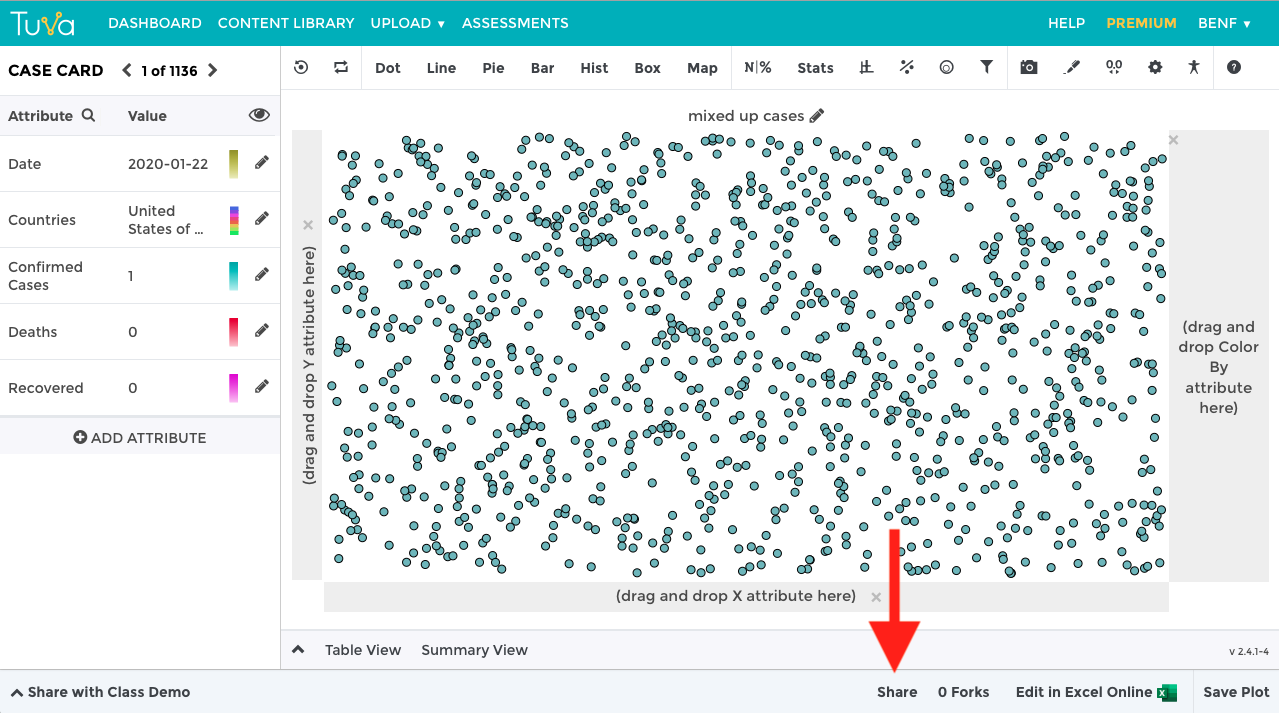
Open your dataset and click Share in the footer.
-
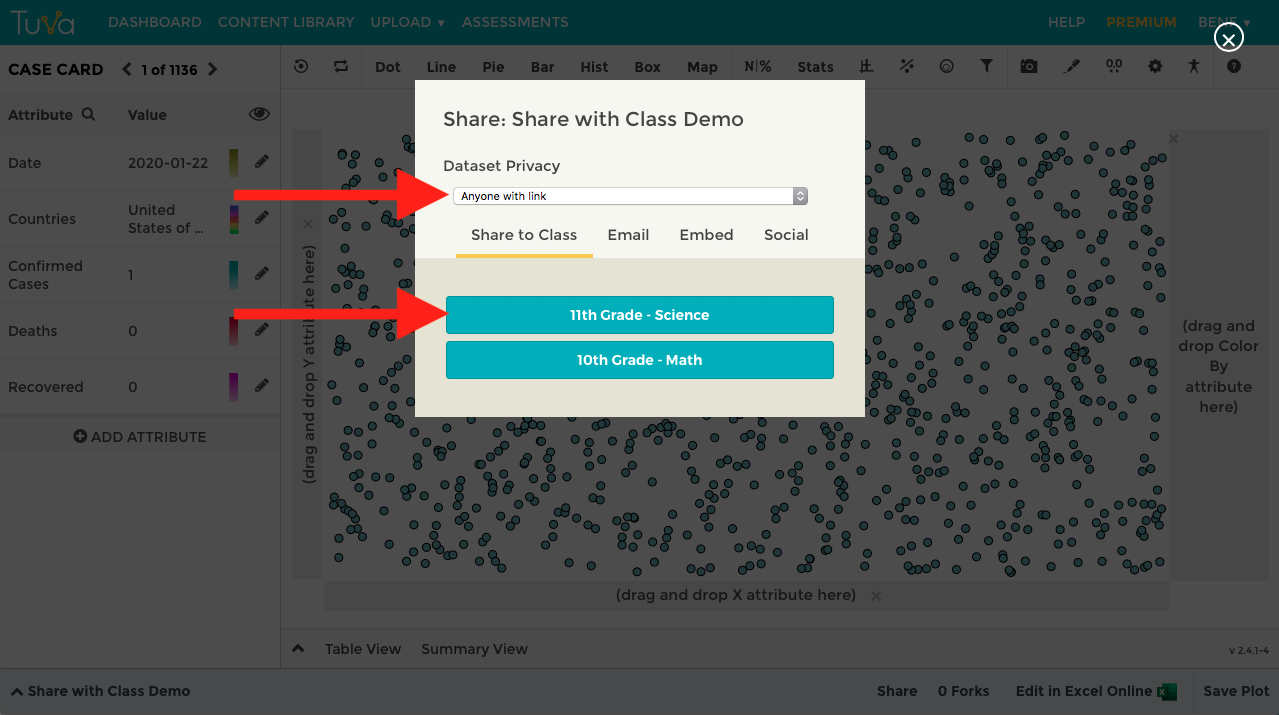
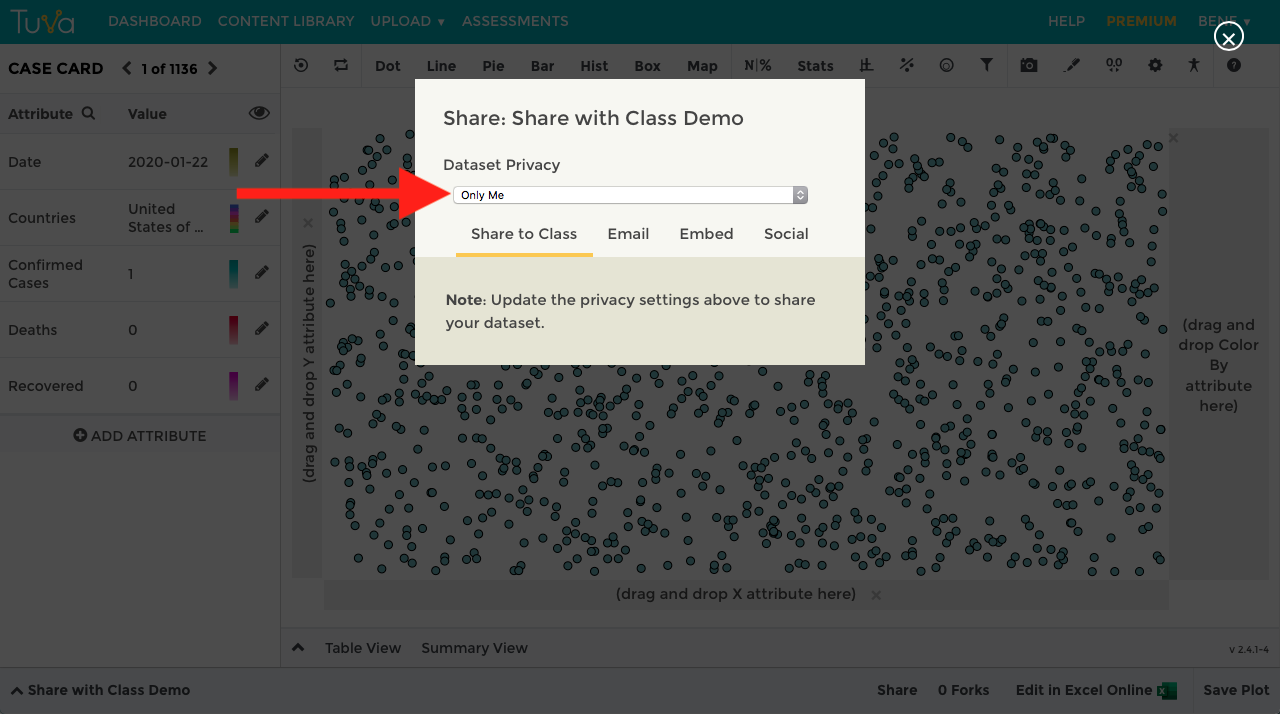
In the Dataset Privacy dropdown, choose Anyone with a link. Your list of classes only appears once privacy is set — while the dataset is Only Me, there is nothing to share with.
-
Click the button with your class’s name. It turns orange to confirm the dataset is shared with that class.
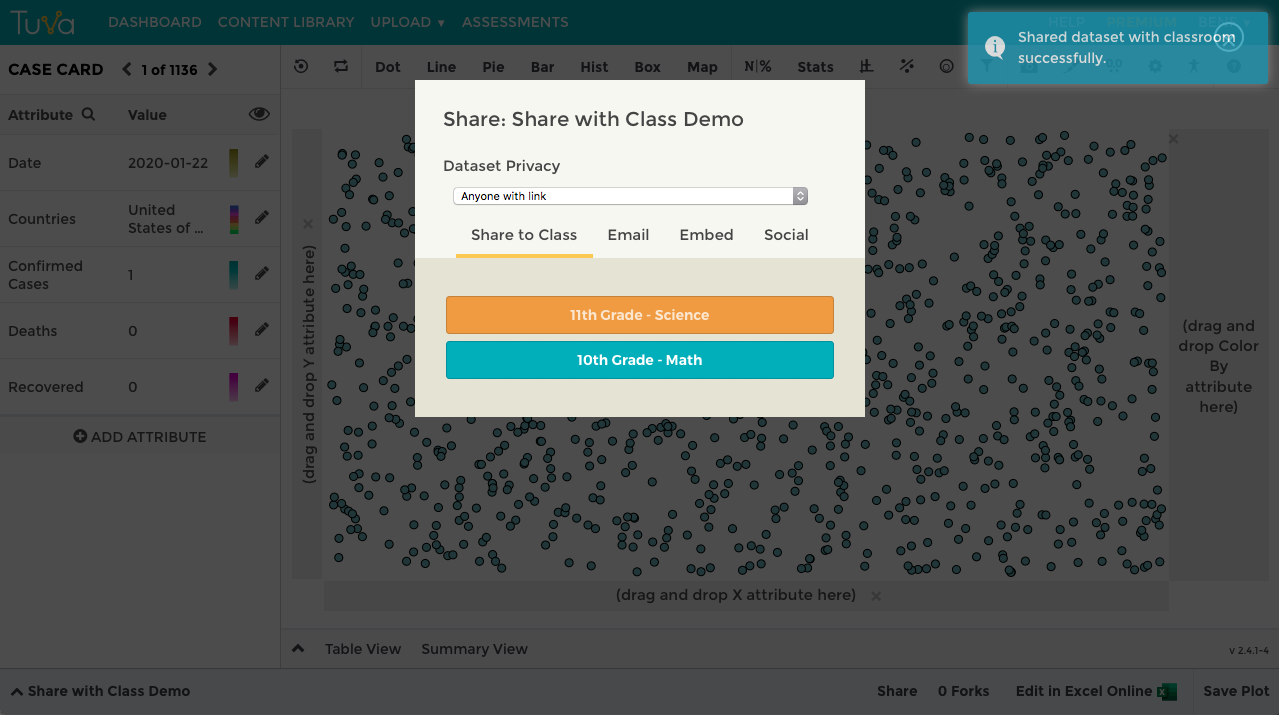
Once privacy is set to Anyone with a link, you can also just send the dataset’s URL — anyone who opens it can view the data, whether or not they are in one of your classes.
Where students find it
Section titled “Where students find it”-
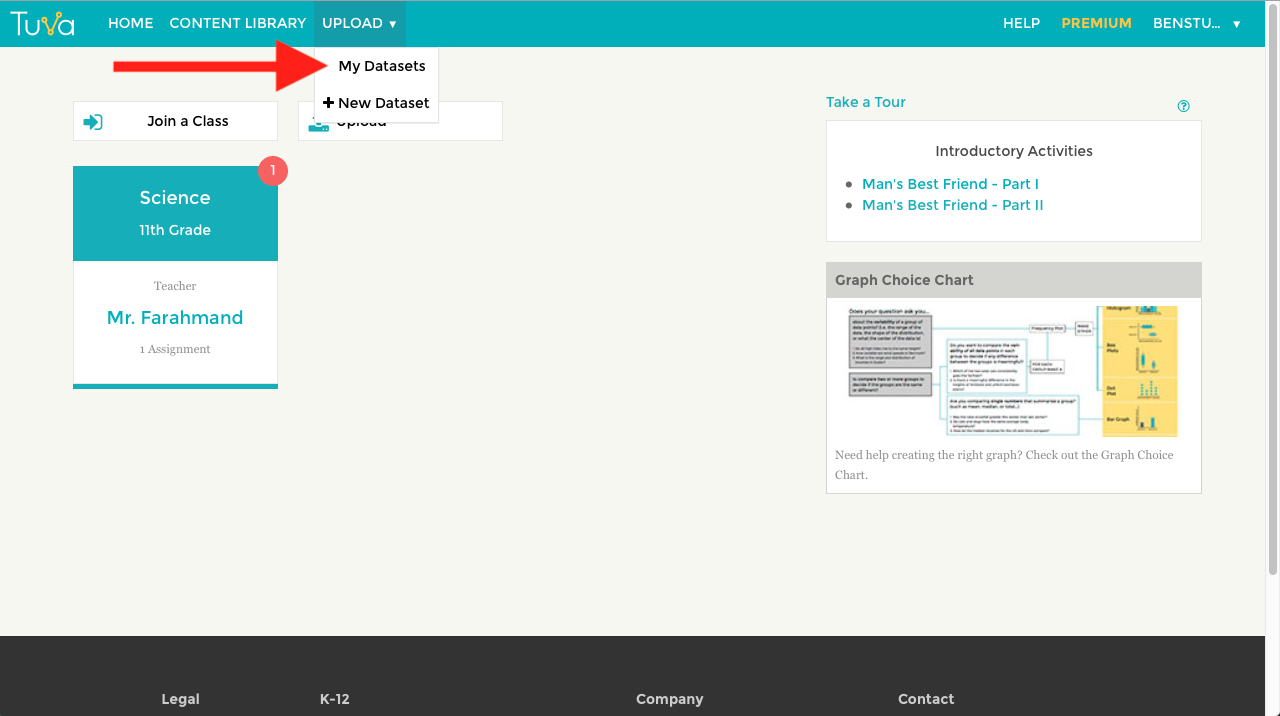
Students open My Datasets from the Upload menu in the top navigation.
-
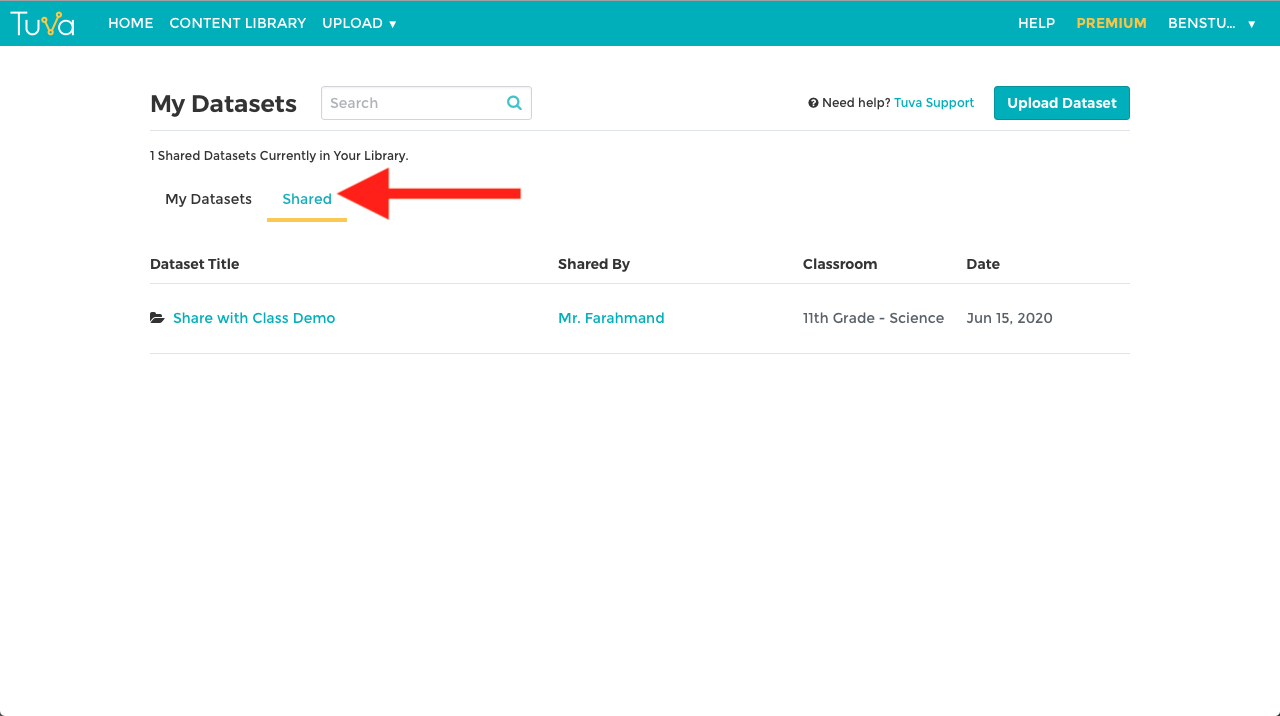
On that page they click the Shared tab, which lists everything shared with them.
Stop sharing
Section titled “Stop sharing”Open the dataset, click Share, and set Dataset Privacy back to Only Me.
Was this page helpful?
This opens the ticket form with your comment and a link to this page, so we can reply to you.
Submit a ticket