
Go to the class roster
Section titled “Go to the class roster”-
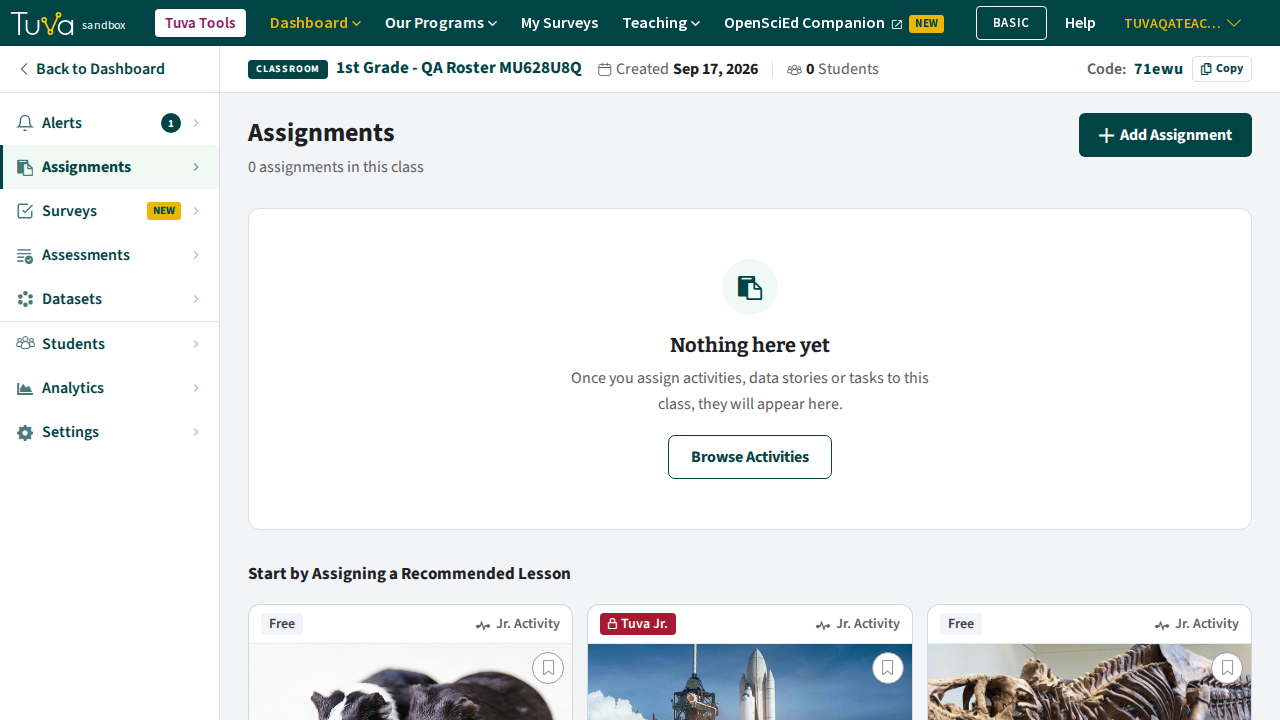
From your dashboard, select the class you want to add or remove students from.
-
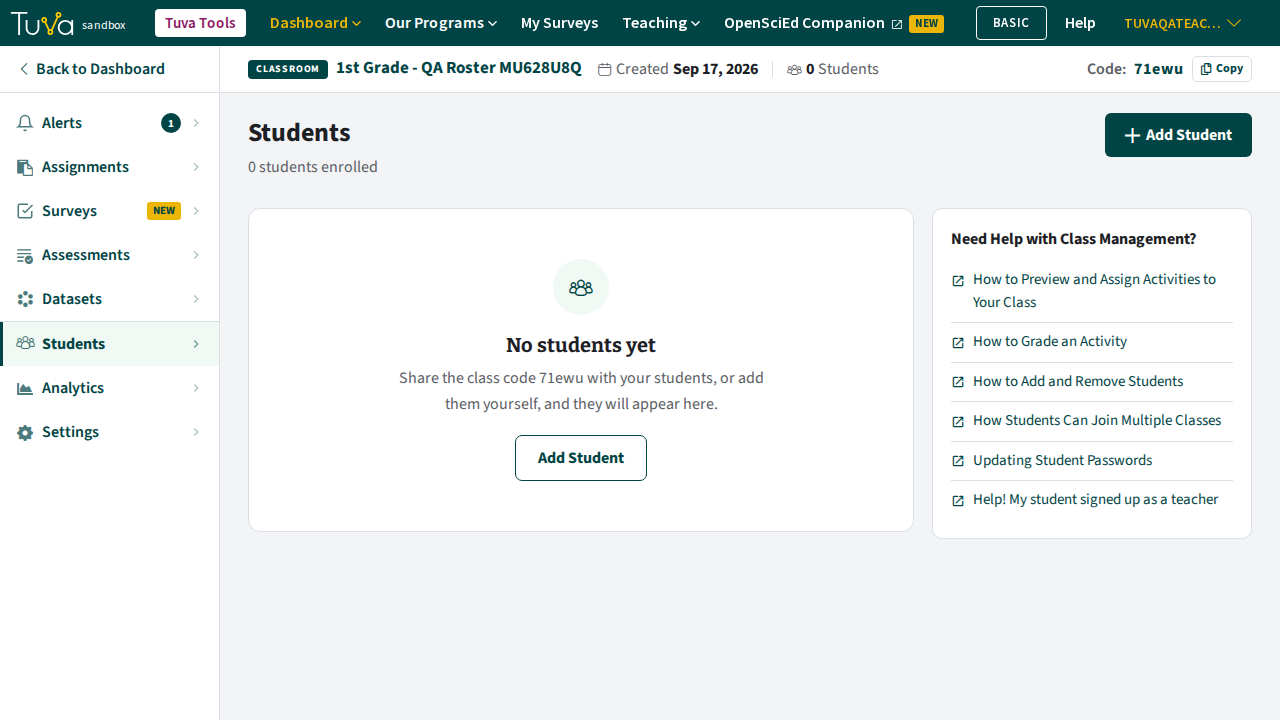
Click Students on the classroom navigation menu.
Add a student manually
Section titled “Add a student manually”-
Click Add Student, at the top of the Students page.
-
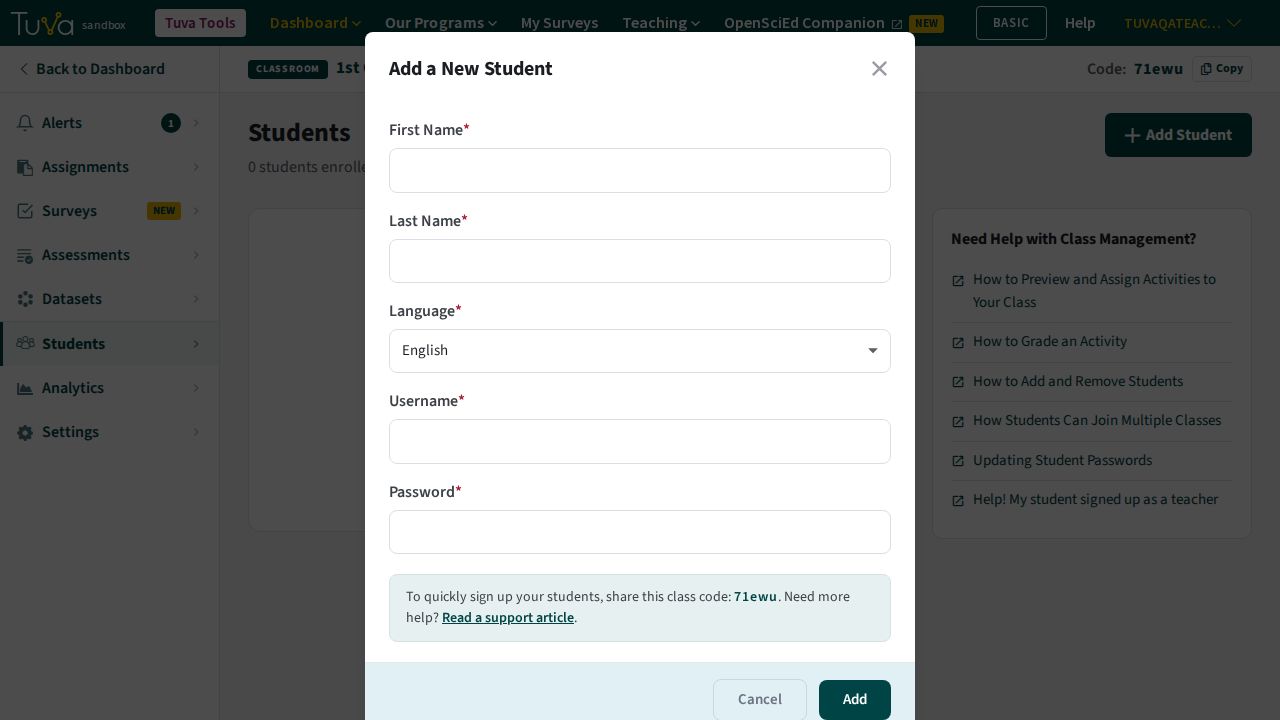
In the Add a New Student pop-up, enter the student’s First Name, Last Name, and a Username, and set a Password for them. Language defaults to English — change it if the student needs a different one. You’ll need to share the username and password you create here with the student so they can sign in.
-
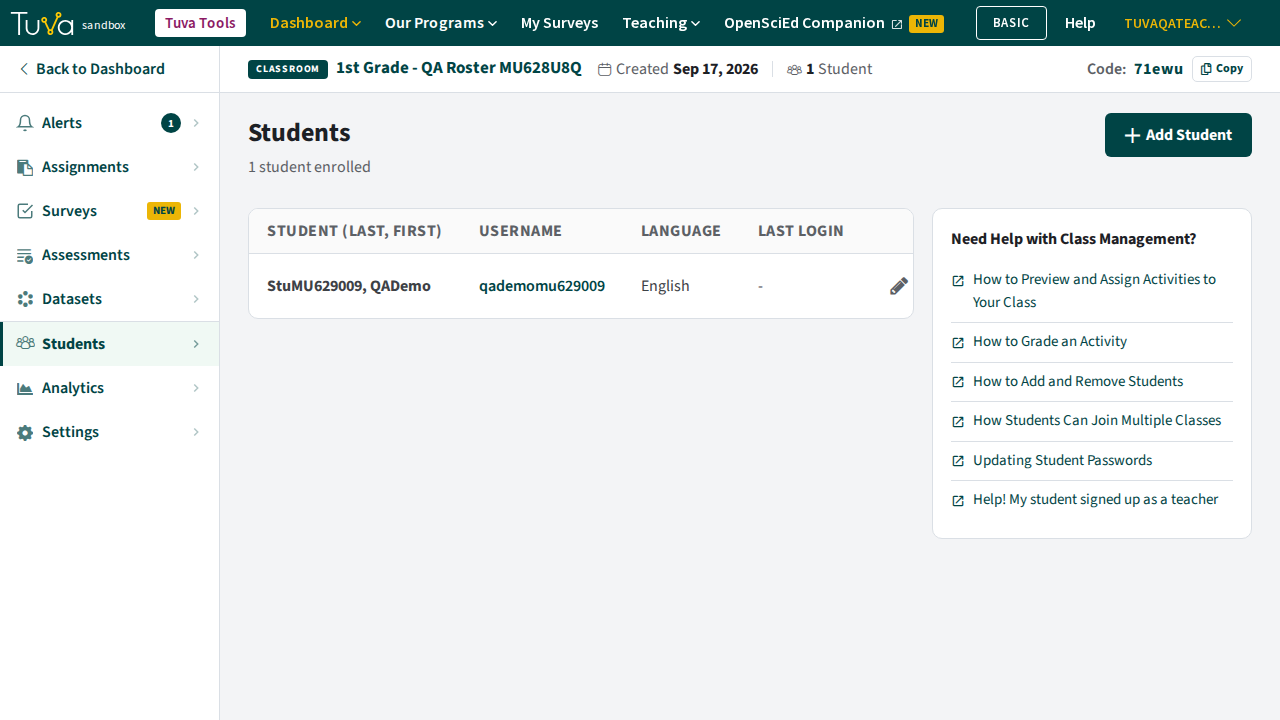
Click Add. The student appears in the roster right away, and is still there if you reload the page.
Edit a student’s details
Section titled “Edit a student’s details”-
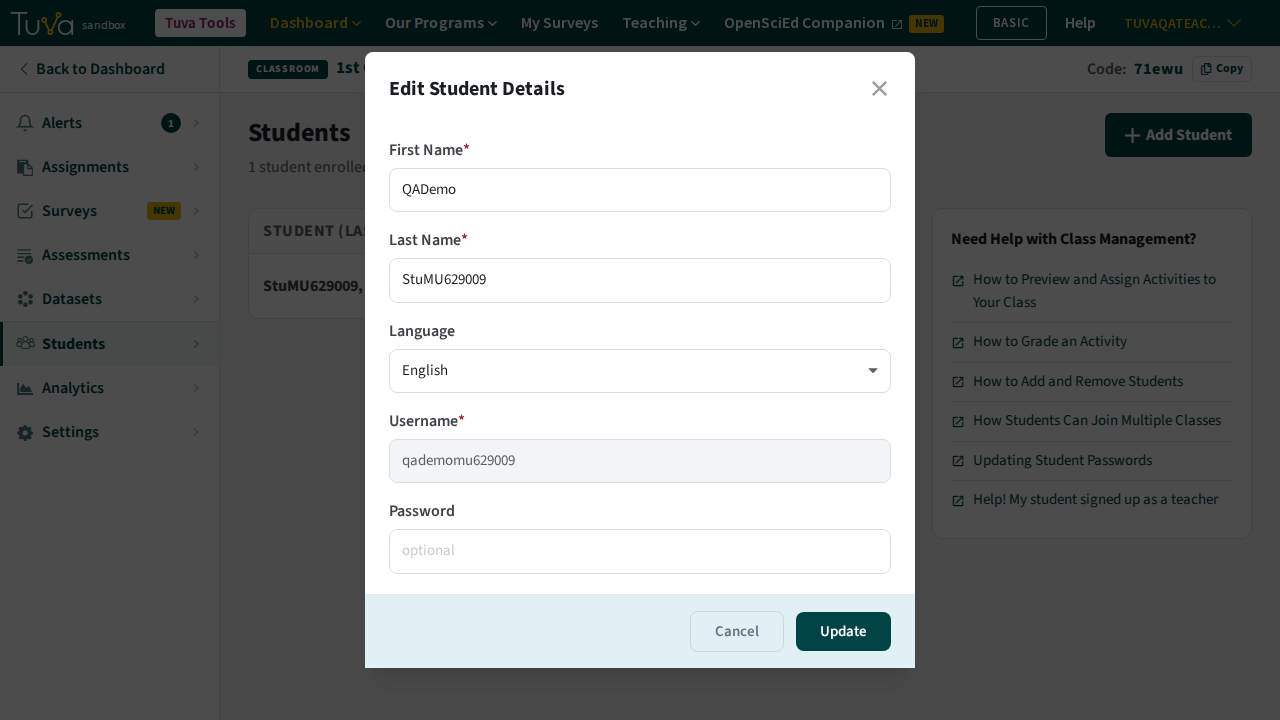
In the student’s row, click the pencil icon to open Edit a Student. You can change their first name, last name, and language. The username can’t be changed once the account is created.
-
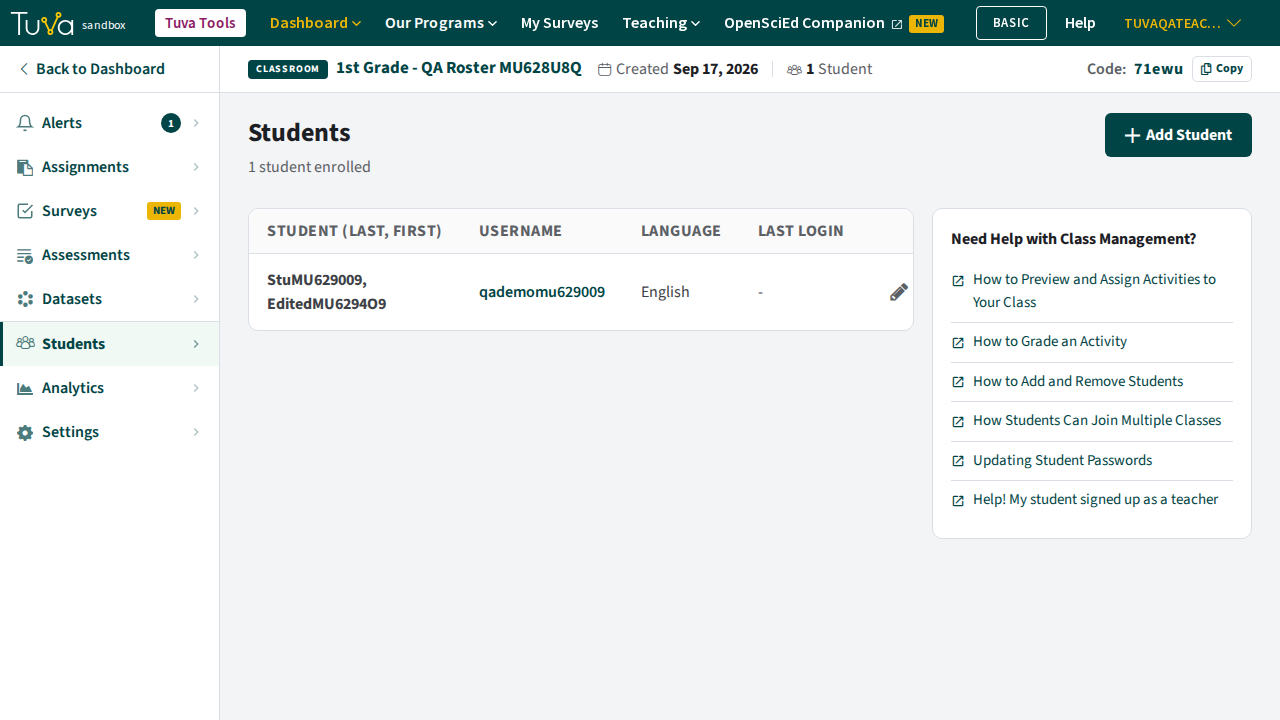
Click Update. The new details show immediately and are still there after you reload the page.
Remove a student
Section titled “Remove a student”-
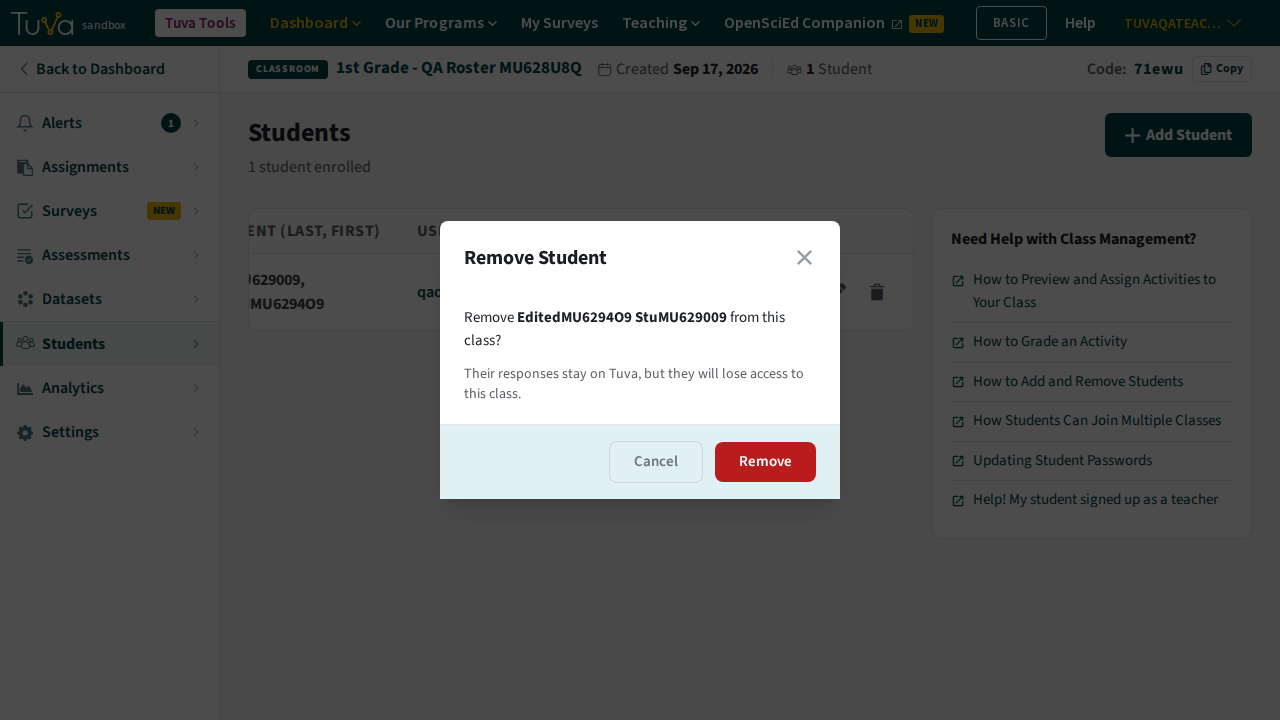
In the student’s row, click the trash icon.
-
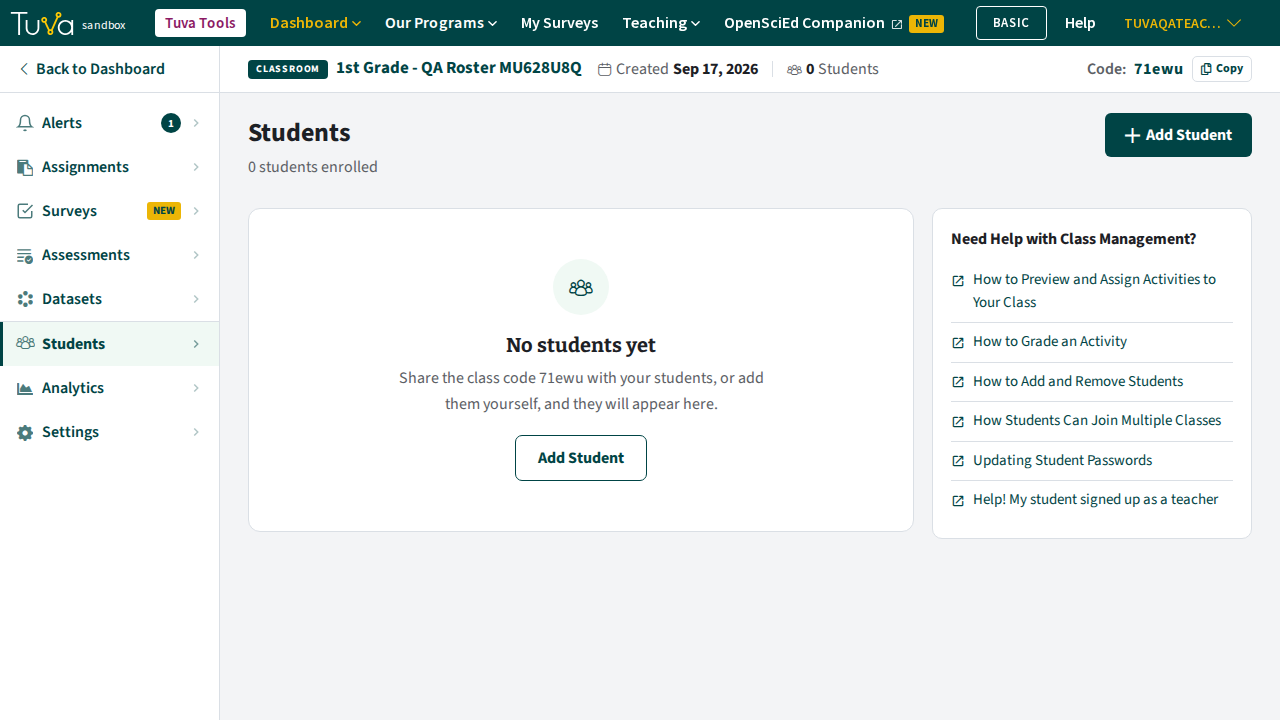
In the Remove Student pop-up, click Remove. The student’s responses stay in Tuva, but they lose access to this class and disappear from the roster — including after you reload the page.
For a whole class at once, share your class code and let students register themselves.
Was this page helpful?
This opens the ticket form with your comment and a link to this page, so we can reply to you.
Submit a ticket